Introduction
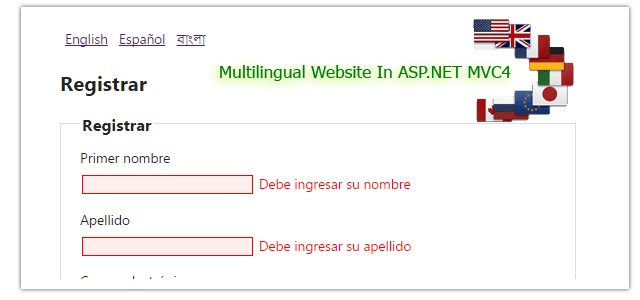
In this post, I explain how to create a multilingual website in asp.net mvc4.In today’s competitive web world, not having a multilingual website implies you are ignoring the needs of a major part of the world population. So, This is most important to have multilingual website to reach more customer and thus increase revenue. Here I am going to explain how we can do our website multilingual in asp.net mvc application easily.
If you have asp.net webform application, visit how to create multilingual application in asp.net webform.
Steps :
Step - 1: Create New Project.
Go to File > New > Project > Select asp.net MVC4 web application > Entry Application Name > Click OK > Select Basic > Select view engine Razor > OKStep - 2: Add Resource File for different languages
Here I have added 3 resource file for 3 languages- Resource.resx - This is the default resource file associated with the English language.
- Resource.es.resx - This resource file is associated with the Spanish language.
- Resource.bn.resx - This resource file is associated with the Bengali language.
[N.B: Don't forget to change all the resource files Access Modifier to Public ]

Step - 3 : Create a Class (Module)
Go to Solution Explorer > Right Click on Modules folder > Add > Class > Enter Class name > Add. using System.ComponentModel.DataAnnotations;
namespace MvcMultilingual.Models
{
public class RegistrationModel
{
// Here typeof(Resource) is The File Name Start With for resources
[Display(Name="FirstName", ResourceType=typeof(Resource))]
[Required(ErrorMessageResourceType = typeof(Resource), ErrorMessageResourceName = "FirstNameRequired")]
public string FirstName { get; set; }
[Display(Name = "LastName", ResourceType = typeof(Resource))]
[Required(ErrorMessageResourceType = typeof(Resource), ErrorMessageResourceName = "LastNameRequired")]
public string LastName { get; set; }
[Display(Name = "Email", ResourceType = typeof(Resource))]
[Required(ErrorMessageResourceType = typeof(Resource), ErrorMessageResourceName = "EmailRequired")]
[RegularExpression(@"^([0-9a-zA-Z]([\+\-_\.][0-9a-zA-Z]+)*)+@(([0-9a-zA-Z][-\w]*[0-9a-zA-Z]*\.)+[a-zA-Z0-9]{2,3})$",
ErrorMessageResourceType = typeof(Resource), ErrorMessageResourceName = "EmailInvalid")]
public string Email { get; set; }
[Display(Name = "Age", ResourceType = typeof(Resource))]
[Required(ErrorMessageResourceType = typeof(Resource), ErrorMessageResourceName = "AgeRequired")]
[Range(18, 60, ErrorMessageResourceType = typeof(Resource), ErrorMessageResourceName = "AgeRange")]
public int Age { get; set; }
}
}
Step-4: Add an another class for Manage Languages property & function.
Go to Solution Explorer > Right Click on Project name form Solution Explorer > Add > Class > Enter Class Name > Add. using System;
using System.Collections.Generic;
using System.Globalization;
using System.Linq;
using System.Threading;
using System.Web;
namespace MvcMultilingual
{
public class SiteLanguages
{
public static List<Languages> AvailableLanguages = new List<Languages>
{
new Languages{ LangFullName = "English", LangCultureName = "en"},
new Languages{ LangFullName = "Español", LangCultureName = "es"},
new Languages{ LangFullName = "বাংলা", LangCultureName = "bn"}
};
public static bool IsLanguageAvailable(string lang)
{
return AvailableLanguages.Where(a => a.LangCultureName.Equals(lang)).FirstOrDefault() != null ? true : false;
}
public static string GetDefaultLanguage()
{
return AvailableLanguages[0].LangCultureName;
}
public void SetLanguage(string lang)
{
try
{
if (!IsLanguageAvailable(lang))
lang = GetDefaultLanguage();
var cultureInfo = new CultureInfo(lang);
Thread.CurrentThread.CurrentUICulture = cultureInfo;
Thread.CurrentThread.CurrentCulture = CultureInfo.CreateSpecificCulture(cultureInfo.Name);
HttpCookie langCookie = new HttpCookie("culture", lang);
langCookie.Expires = DateTime.Now.AddYears(1);
HttpContext.Current.Response.Cookies.Add(langCookie);
}
catch (Exception ex)
{
}
}
}
public class Languages
{
public string LangFullName { get; set; }
public string LangCultureName { get; set; }
}
}
Step-5: Add an another class (inherit Controller) Where we will override BeginExecuteCore.
Go to Solution Explorer > Right Click on Project name form Solution Explorer > Add > Class > Enter Class Name > Add.Here I have added this for check & set language each time any request execute.
            using System;
            using System.Web;
            using System.Web.Mvc;

            namespace MvcMultilingual
            {
                public class MyBaseController : Controller
                {
                    // Here I have created this for execute each time any controller (inherit this) load
                    protected override IAsyncResult BeginExecuteCore(AsyncCallback callback, object state)
                    {
                        string lang = null;
                        HttpCookie langCookie = Request.Cookies["culture"];
                        if (langCookie != null)
                        {
                            lang = langCookie.Value;
                        }
                        else
                        {
                            var userLanguage = Request.UserLanguages;
                            var userLang = userLanguage != null ? userLanguage[0] : "";
                            if (userLang != "")
                            {
                                lang = userLang;
                            }
                            else
                            {
                                lang = SiteLanguages.GetDefaultLanguage();
                            }
                        }

                        new SiteLanguages().SetLanguage(lang);

                        return base.BeginExecuteCore(callback, state);
                    }
                }
            }
Step-6: Add a new Controller.
Go to Solution Explorer > Right Click on Controllers folder form Solution Explorer > Add > Controller > Enter Controller name > Select Templete "empty MVC Controller"> Add.Step-7: Add new action into your controller for Get Action method.
Here I have added "Index" Action into "Home" Controller. Please write this following code using System.Linq;
using System.Web;
using System.Web.Mvc;
namespace MvcMultilingual.Controllers
{
public class HomeController : MyBaseController
{
public ActionResult Index()
{
return View();
}
}
}
Step-8: Add view for the Action & design.
Right Click on Action Method (here right click on form action) > Add View... > Enter View Name > Select View Engine (Razor) > Check "Create a strong-typed view" > Select your model class > Add.[N:B:Please Rebuild solution before add view.]
Complete View
         @model MvcMultilingual.Models.RegistrationModel
        @{
            ViewBag.Title = MvcMultilingual.Resource.Register;
        }

        <h2>@MvcMultilingual.Resource.Register</h2>

        @using (Html.BeginForm()) {
            @Html.ValidationSummary(true)

            <fieldset>
                <legend>@MvcMultilingual.Resource.Register</legend>

                <div class="editor-label">
                    @Html.LabelFor(model => model.FirstName)
                </div>
                <div class="editor-field">
                    @Html.EditorFor(model => model.FirstName)
                    @Html.ValidationMessageFor(model => model.FirstName)
                </div>

                <div class="editor-label">
                    @Html.LabelFor(model => model.LastName)
                </div>
                <div class="editor-field">
                    @Html.EditorFor(model => model.LastName)
                    @Html.ValidationMessageFor(model => model.LastName)
                </div>

                <div class="editor-label">
                    @Html.LabelFor(model => model.Email)
                </div>
                <div class="editor-field">
                    @Html.EditorFor(model => model.Email)
                    @Html.ValidationMessageFor(model => model.Email)
                </div>

                <div class="editor-label">
                    @Html.LabelFor(model => model.Age)
                </div>
                <div class="editor-field">
                    @Html.EditorFor(model => model.Age)
                    @Html.ValidationMessageFor(model => model.Age)
                </div>

                <p>
                    <input type="submit" value="@MvcMultilingual.Resource.Register" />
                </p>
            </fieldset>
        }


        @section Scripts {
            @Scripts.Render("~/bundles/jqueryval")
        }
Step-9: Add another action into your controller for POST Method
Here I have added "Index" Action into "HomeController" Controller for POST Action. Please write this following code [HttpPost]
public ActionResult Index(RegistrationModel r)
{
return View(r);
}
Step-10: Add another action into your controller for Change Language
Here I have added "ChangeLanguage" Action into "HomeController" Controller for Change Language. Please write this following codeComplete Layout Page
            public ActionResult ChangeLanguage(string lang)
            {
                new SiteLanguages().SetLanguage(lang);
                return RedirectToAction("Index", "Home");
            }
Step-11: Modify Layout Page for Show Available Languages (Language Switcher).
Complete Layout Page <!DOCTYPE html>
<html>
<head>
<meta charset="utf-8" />
<meta name="viewport" content="width=device-width" />
<title>@ViewBag.Title</title>
@Styles.Render("~/Content/css")
@Scripts.Render("~/bundles/modernizr")
</head>
<body>
<div style="padding:5px">
@* Here I will add Language Switcher *@
@{
foreach (var i in MvcMultilingual.SiteLanguages.AvailableLanguages)
{
@Html.ActionLink(i.LangFullName, "ChangeLanguage", "Home", new{lang = i.LangCultureName}, null) <text> </text>
}
}
</div>
@RenderBody()
@Scripts.Render("~/bundles/jquery")
@RenderSection("scripts", required: false)
</body>
</html>
