Introduction
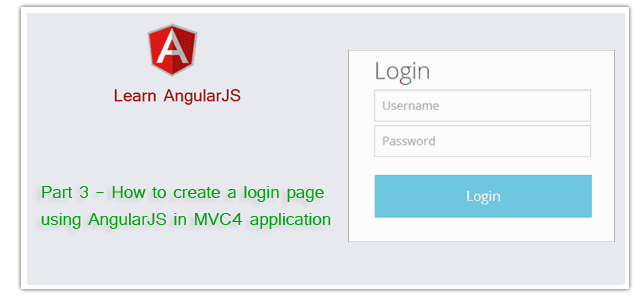
In this post, I would like to explain Part 3 - How to create a login page using AngularJS in MVC4 application.This is our third Post about AngularJS. Here I have explained a little about AngularJS and What we will learn in this section part by part. In Part1 of this post we configured AngularJS in MVC4 application. In this part (Part 3) I am going to explain how to create a login page using AngularJS in MVC4 application.
In Part 2 We used Get Method of AngularJS $http service for Fetch Data from Database. Here In this example We will see how we can use Post Method of AngularJS $http service for post data to the server.
Steps :
Step-1: Create table into the database.
Open Database > Right Click on Table > Add New Table > Add Columns > Save > Enter table name > Ok.Step-2: Update Entity Data Model.
Go to Solution Explorer > Open your Entity Data Model (here "MyModel.edmx") > Right Click On Blank area for Get Context Menu > Update Model From Database... > A popup window will come (Entity Data Model Wizard) > Select Tables > Finish.Step-3: Create a Model (Class).
Here I have created a Model in the Models folder.Go to Solution Explorer > Right Click on Models folder form Solution Explorer > Add > Class > Enter name > Add.
Here I have created a model (class) Named "LoginData".
Write following code in this class.
            namespace MVCWithAngularJs.Models
            {
                public class LoginData
                {
                    public string Username { get; set; }
                    public string Password { get; set; }
                }
            }
Step-4: Add new action into your controller (here in the Data Controller) for Login and return User data as JsonResult from Database.
Here I have added "UserLogin" Action into "DataController". Please write this following code public JsonResult UserLogin(LoginData d)
{
using (MyDatabaseEntities dc = new MyDatabaseEntities())
{
var user = dc.Users.Where(a => a.Username.Equals(d.Username) && a.Password.Equals(d.Password)).FirstOrDefault();
return new JsonResult { Data = user, JsonRequestBehavior = JsonRequestBehavior.AllowGet };
}
}
Step-5: Add a new js File for add a new AngularJS controller and a Factory
Go to Solution Explorer > Right Click on folder (where you want to saved your AngularJS controller files, here I have created a folder named "AngularController" under Scripts Folder) > Add > Select Javascript file > Enter name > Add.Write following code in this file.
             angular.module('MyApp') // extending from previously created angular module in the First Part
            .controller('Part3Controller', function ($scope, LoginService) {
                $scope.IsLogedIn = false;
                $scope.Message = '';
                $scope.Submitted = false;
                $scope.IsFormValid = false;

                $scope.LoginData = {
                    Username: '',
                    Password: ''
                };

                //Check is Form Valid or Not // Here f1 is our form Name
                $scope.$watch('f1.$valid', function (newVal) {
                    $scope.IsFormValid = newVal;
                });

                $scope.Login = function () {
                    $scope.Submitted = true;
                    if ($scope.IsFormValid) {
                        LoginService.GetUser($scope.LoginData).then(function (d) {
                            if (d.data.Username != null) {
                                $scope.IsLogedIn = true;
                                $scope.Message = "Successfully login done. Welcome " + d.data.FullName;

                            }
                            else {
                                alert('Invalid Credential!');
                            }
                        });
                    }
                };

            })
            .factory('LoginService', function ($http) {
                var fac = {};
                fac.GetUser = function (d) {
                    return $http({
                        url: '/Data/UserLogin',
                        method: 'POST',
                        data: JSON.stringify(d),
                        headers: {'content-type':'application/json'}
                    });
                };
                return fac;
            });
Step-6: Add new action into your controller for Get the View for Login.
Here I have added "Part3" Action into "Home" Controller. Please write this following code public ActionResult Part3() // Login from Database
{
return View();
}
Step-7: Add view for the Action & design.
Right Click on Action Method (here right click on form action) > Add View... > Enter View Name > Select View Engine (Razor) > Add.Complete View
           @{
                ViewBag.Title = "Part3";
            }

            <style>
                 input{
                    padding:5px;
                    border:1px solid #A5A5A5;
                }
                input.ng-dirty.ng-invalid {
                    border:1px solid red;
                    background-color:rgb(255, 244, 244);
                }
                .error {
                    color:red;
                }
            </style>

            <h2>Part3 - Create Login Page</h2>

            <div ng-controller="Part3Controller">
                <form novalidate name="f1" ng-submit="Login()">
                    <div style="color:rgb(142,2,2)">{{Message}}</div>
                    <table ng-show="!IsLogedIn"> <!-- Here  ng-show="!IsLogedIn" means I want to hide table after loged in-->
                        <tr>
                            <td>Username : </td>
                            <td>

                                <!-- Here ng-class="Submitted?'ng-dirty':''" Means if submitted (clicked submit button) then make this dirty state
                                    for show red border-->
                                <input type="text" ng-model="LoginData.Username" name="cUsername" ng-class="Submitted?'ng-dirty':''" required autofocus />
                                <span class="error" ng-show="(f1.cUsername.$dirty || Submitted) && f1.cUsername.$error.required">Username required</span>

                                <!-- ng-show="(f1.cUsername.$dirty || Submitted) && f1.cUsername.$error.required" Means I want to show this span only when
                                    the control cUsername is invalid-->
                            </td>
                        </tr>
                        <tr>
                            <td>Password : </td>
                            <td>
                                <input type="password" ng-model="LoginData.Password"  name="cPassword" ng-class="Submitted?'ng-dirty':''" required autofocus />
                                <span class="error" ng-show="(f1.cPassword.$dirty || Submitted) && f1.cPassword.$error.required">Password required</span>
                            </td>
                        </tr>
                        <tr>
                            <td></td>
                            <td>
                                <input type="submit" value="Login" />
                            </td>
                        </tr>
                    </table>
                </form>
            </div>


            @section scripts{
                <script src="~/Scripts/AngularController/Part3Controller.js"></script>
            }
Here you can see I have used followings :
- ng-submit : ng-submit prevents the default action of form and binds angular function to onsubmit events. This is invoked when form is submitted means submit button is pressed.
- ng-show : The ngShow allow us to display or hide different elements based on the expression provided to the ngShow attribute.
- ng-model : ng-model has two-way data binding [$scope to View and View to $scope]. Its also has built-in validation and Keeping the state of the control. Based on the state its set related class to the element.
- ng-class : Sometimes we need to change our view's CSS classes on-the-fly. Its allow us to dynamically set CSS classes based on Angular evaluated expressions
- $dirty : This is a property of form elements and its True if user has already interacted with the form. There are many more properties like $pristine, $valid, $invalid, $submitted and $error.


